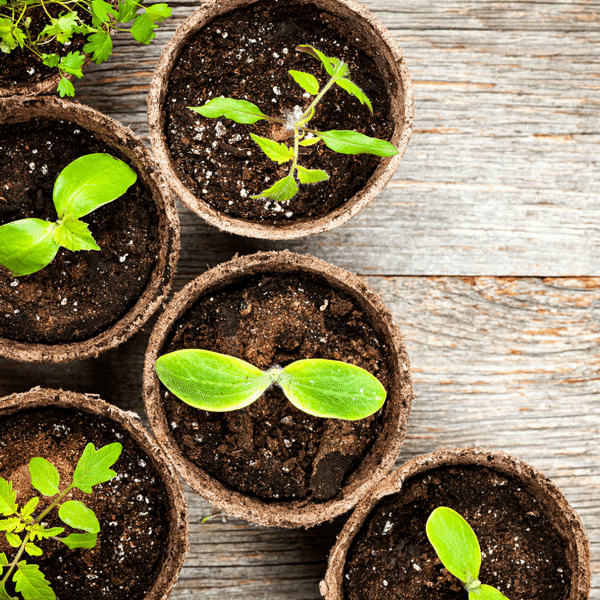
1. Fresh is best. Always start with fresh, high quality seeds. We carry Botanical Interests seeds, which are non-GMO and include Heirloom and Organic varieties.
2. Plastic is fantastic. You can purchase plastic trays and greenhouse starter kits designed specifically for starting seeds. They’re clean and free of pathogens, keep soil uniformly moist and allow for adequate drainage.
3. Use a magical mix. Good mixes ensure that you’ve got a lightweight, clean and sterile medium without insects, fungus or weeds. Moisten the mix with a little water (damp, not soggy).
4. Packets know best. Plant your seeds according to the depth and spacing directions on the seed packet. Cover the seeds with soil mix and tamp down to ensure that the seeds are held in firm contact with the soil.
5. Bottom’s up. It can be challenging to apply the right amount of water to freshly sown seeds by pouring, sprinkling or spraying. Wet leaves spread disease, so it’s better to water from the bottom. That means placing the planting container into a larger tray of shallow water.
6. Take cover. Use a clear plastic humidity dome, or loosely cover with plastic wrap retain moisture. Check the moisture daily and watch for germination.
7. Stay warm. For most seeds, sprouting requires a minimum temperature of about 65 to 75 degrees. If the ambient temperature is less than that, you can position a space heater nearby or use a heating mat. Just make sure the soil doesn’t dry out.
8. Let the light shine in. Most seeds need about 12 to 16 hours of sunlight each day. You can place them on a sunny windowsill, but often that’s not enough light, and the young seedlings will grow spindly trying to reach for the sun. Grow lights are a great investment because they provide optimum lighting in a spectrum that’s ideal for young plants, and they can even be set on a timer!
9. The need to feed. In the very early growth stage, the seed provides its own nourishment. Once one set of true leaves develop, it’s time for a little liquid fertilizer like Neptune’s Harvest. For best results, dilute and mix with the water in the bottom tray so they can drink it up through their roots.
10. Pinch them back. Once the second set of leaves comes in, pinch them off to maximize root and stem growth, and fertilize again. Then let them grow a little more.
11. Pot them up. A few weeks before your last frost date, select the best looking seedlings and gently transfer them to a larger pot or container such as a biodegradable peat pot or a plastic nursery container. You can use quality potting soil or a compost mix, or add a little liquid fertilizer again.
12. Harden them off. Your sheltered seedlings need to get ready for the outdoors. Keep an eye on the weather and your last frost date, and choose days that are mild, calm, and sunny. Put your plants outside for a few hours each day, increasing their exposure to sunlight and wind, then bring them in at night or if there will be a frost. Your plants will become hardier and better prepared for transplanting.
13. Planting time. The best times to plant are early mornings, on partly sunny or overcast days just before a gentle rain. Bring your young plants outdoors and gently remove plants from their containers without stripping the roots naked or tearing them. Plant them in the ground and mix in some compost to give them a great start, and water them in.
Hopkinton
93 East Main Street
Hopkinton, MA 01748
(508) 435-3414
Daily 9am – 5pm
By The Yard
Closed Except By Appointment- Call 508-293-8050 or 508-293-8028
Chelmsford
160 Pine Hill Road
Chelmsford, MA 01824
(978) 349-0055
Daily 9am – 6pm
Hingham
1099 Main Street
Hingham, MA 02043
(781) 749-3773
Daily 9am – 7pm
Lincoln
339 South Great Road
Lincoln, MA 01773
(781) 259-8884
Daily 9am – 5pm


