Thank you for your plant purchase, how exciting! Here are a few general tips to help you on your journey. If you have any follow-up questions regarding the installation & care of your new plant, be sure to contact a salesperson or search our website for more information.
Planting
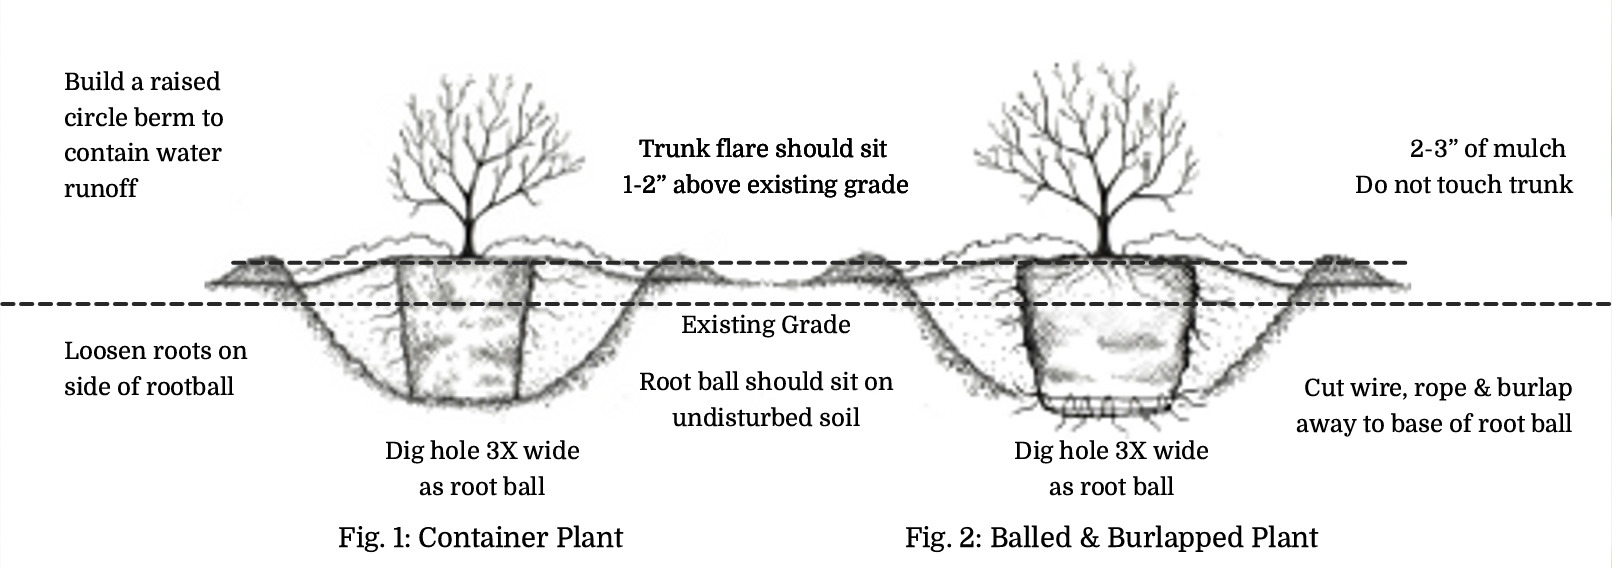
- Measure the height of the root ball of your new plant, from the bottom of the roots to the “flare” of the trunk, where it meets the soil.
- Dig a hole twice as wide and no deeper than the height of the root ball of the plant.
- CONTAINER PLANTS (Fig. 1): Carefully remove the container and loosen the roots with your fingers or a cultivator.
- BALLED & BURLAPPED MATERIAL (Fig. 2): Place the plant in the hole with the burlap still on the root ball. Using scissors or wire cutters, gently cut away burlap, rope, and wire, all the way to the base of the root ball to expose the trunk flare. See the diagram below.
- Water the root ball & surrounding soil before filling in the hole. This helps the plant accept hydration more readily.
- Blend soil amendments with the native soil. Backfill the planting hole until it is halfway full, then water the soil.
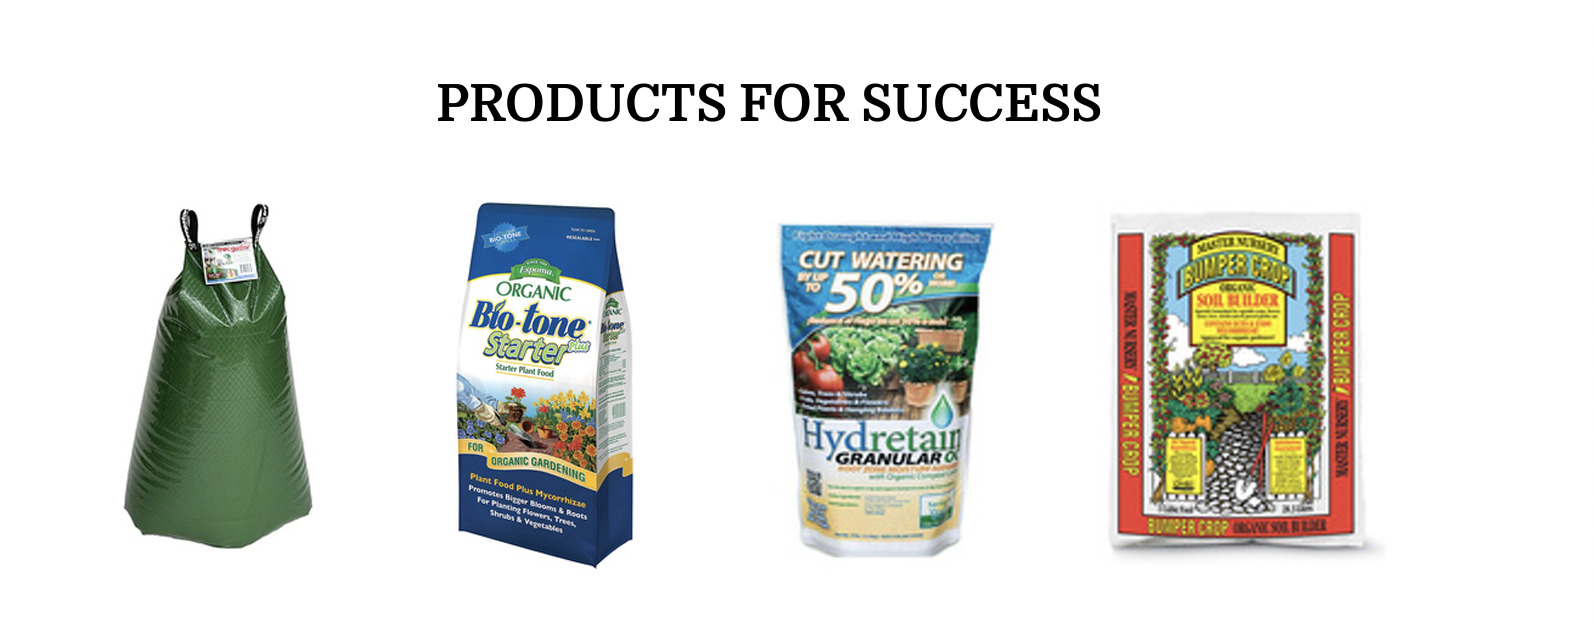
- Finish backfilling the plant hole with the amended soil combined with Espoma Bio-Tone®. Tamp the soil lightly to avoid leaving air pockets, and smooth the surface soil with your hands or a rake. Make sure the trunk flare is still exposed.
- Build a saucer-shaped circle berm at the outer edge of the hole to contain water and allow it to soak down to the roots.
Soil Amendment Recommendations
- Bumper Crop® Soil Builder
- Penobscot BlendTM Compost & Peat
- Quoddy BlendTM Lobster Compost
- Fafard® Ultra Outdoor Planting Mix
- Espoma Bio-Tone®
Watering
- Newly installed plants must receive adequate water weekly during the first growing season to become established. The exact amount of water to apply each time and how often is based on the site specific factors such as soil conditions at the site versus the soil in the container or root ball, sun/shade, wind, ground slope, root competition along with proper planting practices. Refer to our Watering Guidelines or ask one our Horticultural experts if unsure as to how much or how often.
- When watering it is important to saturate the soil, making sure the water penetrates to the depth of the root ball. Water slowly and deeply, rather than watering daily in light, sporadic amounts. Typically smaller plants dry out quicker and may need to be watered more frequently versus larger B&B trees which could wait a few days.
- For the remainder of the growing season (April—November), continue to water your plant as often as the soil is dry. Check the top 2” of the soil; if it’s dry, apply more water. If the soil is soggy and the weather has been damp, hold off.
- Note that lawn sprinkler systems do not provide nearly enough water to support new plantings on their own, so don’t rely on them.
- Hand-watering is ideal, but you might find it more convenient to use a TreeGator watering bag or apply Hydretain, which brings water molecules closer to the root zone
Mulch
- Mulching reduces weeds, moderates soil temperatures, and conserves soil moisture in the root zone. We recommend natural shredded pine or leaf mulch, which will decompose over time and amend the soil.
- Place mulch in a wide band approx. 3 times the diameter of the root ball, gently tapering out, and no more than 3” deep.
- DO NOT pile mulch up against the trunk, allow mulch to touch the trunk, or create a “mulch volcano”.
Plant Warranty
Please visit the Plant Warranty page for more information.


