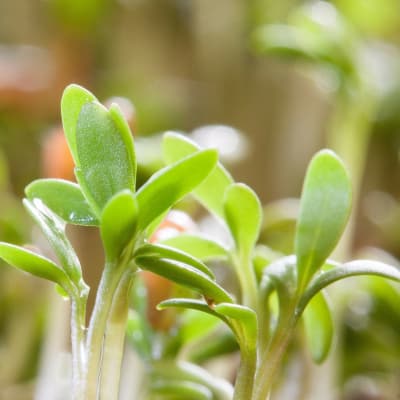
If you’ve ever fancied yourself a farmer, you’ll find that microgreens are an easy and satisfying way to grow your own fresh food, even during the doldrums of winter. Microgreens are basically the young tender shoot of a vegetable plant, and pack a lot of flavor and a ton of nutrients into a little sprout. With just a few basic supplies and a variety of seeds, you can quickly and easily get your own indoor garden up and running, and add a little green homegrown zest to your recipes.
There are lots of seeds that are suitable for microgreens. Basically anything that is edible will work, and it’s fun to experiment with different seeds. Imagine all the vegetables you like- spicy, sweet, aromatic, savory – but packed into a little crunchy green plant. Yum!
Here’s some seeds to try: Mustard, Kale, Endive, Arugula, Beet greens, Spinach, Radish greens, Watercress, Sunflower, Peas, Cabbage, Basil, Cilantro, Lettuce.
We recommend the following materials for your setup:
- Containers, such as peat pots, plastic containers, or a seed starting tray
- A tray for drainage
- Seed starting soil mix
- A clear greenhouse dome or plastic wrap
- Vermiculite
- Plant labels
- A bright light source
- Seeds!
Choose a container that is fairly shallow and has holes for drainage on the bottom. You can use a DIY method by upcycling shallow plastic containers, or purchase a seed starting kit that includes pots or cells for planting, a clear humidity dome, and a tray or drainage.
Next, moisten the seed starting mix with warm water. You’ll find it takes a few minutes for the water to percolate down into the peat. The best method is to put it in a bucket or large ziplock bag and gradually add the water, stirring and squishing and mixing with your hands or a spoon. The consistency should be damp, but not soggy.
Fill each pot or container with the dampened mix, leaving a little bit of space at the top. Keep the soil light and don’t pack it down. Gently level the surface with your fingertips.
Next sprinkle the seeds evenly over the surface of the soil. It’s okay to pile them on and completely cover the soil with seeds.
Then sprinkle a thin layer of vermiculite and cover the seeds. The vermiculite helps retain water so that the newly-sprouted seeds remain moist.
Water the seeds with a mister or fine shower until the vermiculite is soaked. The seeds need to stay damp, so check them regularly and water as necessary.
Place the humidity dome (or clear plastic wrap) over your greens to retain humidity and they will stay moist and happy. A heat mat placed underneath the tray will encourage faster germination. Light isn’t necessary at this point- put your tray of seeds & soil someplace warm where you will be able to check on them daily.
Within a few days to a week you’ll notice your seeds starting to germinate- those first leaves are called the cotyledon and are food reserves for the young sprout. Within another week or so you’ll see the first set of leaves, remove the lid and heat mat and set your little microgreen farm under a light source.
You may find that there is not enough sunlight during the winter months to sustain the young plants, and because of that they will get leggy and spindly. A full-spectrum grow light hung about 4″ above the tray will encourage them to grow full and lush.
In about 10-14 days you will have a full tray of green tasty greens. When they are 1-2 inches tall, use a pair of scissors to snip them at the base of the stems, or pull them up roots & all and rinse them under cool water. Add to salads, soups, sandwiches, use as a garnish or pizza topping, or eat them right from the tray! To store microgreens, wrap them in a damp paper towel and place them in a plastic container in the fridge.
Afterwards you can compost the remainders back into the growing soil and re-plant, or set up a few trays in weekly rotation so that you always have a variety of greens to nibble on.


